Why Shrink Wrapping a Boat for Winter Provides Weather Protection
Wrapping a boat for winter starts with fully winterizing mechanical and plumbing systems, then building a steeply pitched support frame, securing a perimeter strap below the rub rail, draping 7-mil or thicker marine film over the frame, and heat-shrinking it from the bottom up before adding ridge vents. This sequence creates a drum-tight, weatherproof shell that sheds snow and blocks wind-driven moisture. When winter storms roll in, standard tarps and loose mooring covers rarely hold up against heavy snow and driving winds. Traditional canvas or poly tarps often flap in gusty conditions, creating friction that scuffs gelcoat and tears grommets. Water inevitably pools in low spots, freezing into heavy ice dams that stress deck fittings and snap support poles.
Shrink wrapping creates a custom, drum-tight barrier that seals your vessel from bow to stern. Using heat-reactive, high-density polyethylene film, the wrap conforms precisely to the contours of your hull, eliminating loose corners where gale-force gusts can catch and rip the cover away. This tight encapsulation provides an impenetrable barrier against wind-driven rain, sleet, snow, and invasive pests looking for a warm place to nest. It also incorporates UV inhibitors to shield your upholstery, teak, and fiberglass from sun degradation over months of outdoor storage.
Feature / Metric | Professional Shrink Wrap | DIY Shrink Wrapping ---|---|--- Cost Basis | Quoted per foot of overall length, adjusted for beam and top structure | Film, strapping and heat tool bought up front Installation Time | 1–2 hours | 2–4 hours Durability & Seal | Drum-tight, 100% waterproof encapsulation | Variable depending on tension and technique Snow & Ice Load Resistance | Excellent \\(engineered frame sheds heavy snow\\) | Good to Excellent \\(if pitched properly\\) Wind Flap Prevention | Complete hull conformity eliminates loose material | Requires precise strapping to prevent slack Pest Barrier & UV Defense | Seamless seal with UV-inhibited marine film | Seamless seal with UV-inhibited marine film Seasonal Economics | Single-season recyclable film | Single-season recyclable film
Cost Breakdown and Long-Term Value Analysis
Professional shrink wrapping is quoted per foot of overall length, with the rate rising for wider beams and taller top structures. While a DIY approach might save on initial labor, professional application ensures proper frame structure, even heat distribution, and correct perimeter tensioning without the risk of scorching hull surfaces.
Shrink wrap is a single-season, disposable film solution, but its true value lies in preventing multi-thousand-dollar gelcoat restorations, mold remediation, and structural fiberglass repairs caused by water intrusion and ice expansion. When factoring in the peace of mind during severe winter weather, wrapping a boat for winter provides dependable, cost-effective defense for owners storing vessels on outdoor stands or trailers.
Regional Climate Demands and Structural Resilience
In coastal regions and northern climates, boats face aggressive freeze-thaw cycles, coastal humidity, and heavy, wet snow. A flat cover will quickly buckle under hundreds of pounds of accumulation. Building a steep, tented pitch using a solid center ridge line allows snow and ice to slide right off the polyethylene surface before weight can compromise deck hardware. Following a comprehensive winterizing checklist and regional timing guide helps ensure your vessel is sealed well before regional temperatures dip below freezing.
Essential Mechanical Preparation Before Sealing the Hull
Never seal your boat inside a weatherproof wrap until you complete all mechanical and plumbing winterization. A tight wrap prevents precipitation from getting in, but it does not stop trapped water inside internal lines from expanding and cracking engine blocks, heat exchangers, or domestic plumbing. Handling our marine mechanical maintenance tasks first guarantees your vessel is mechanically safeguarded before you enclose the deck.
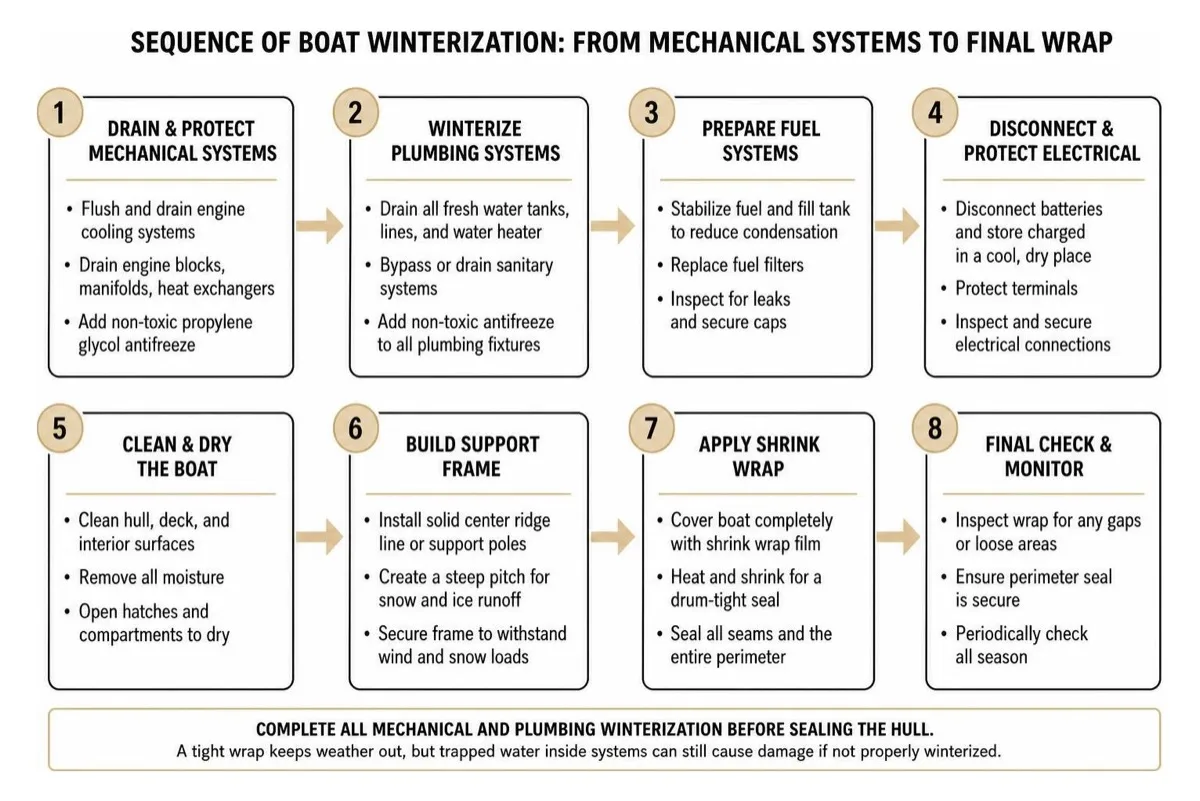
For a complete walkthrough of mechanical systems, consult a complete guide to winterizing engine and plumbing systems to ensure no critical components are overlooked.
Mechanical and Plumbing Drainage
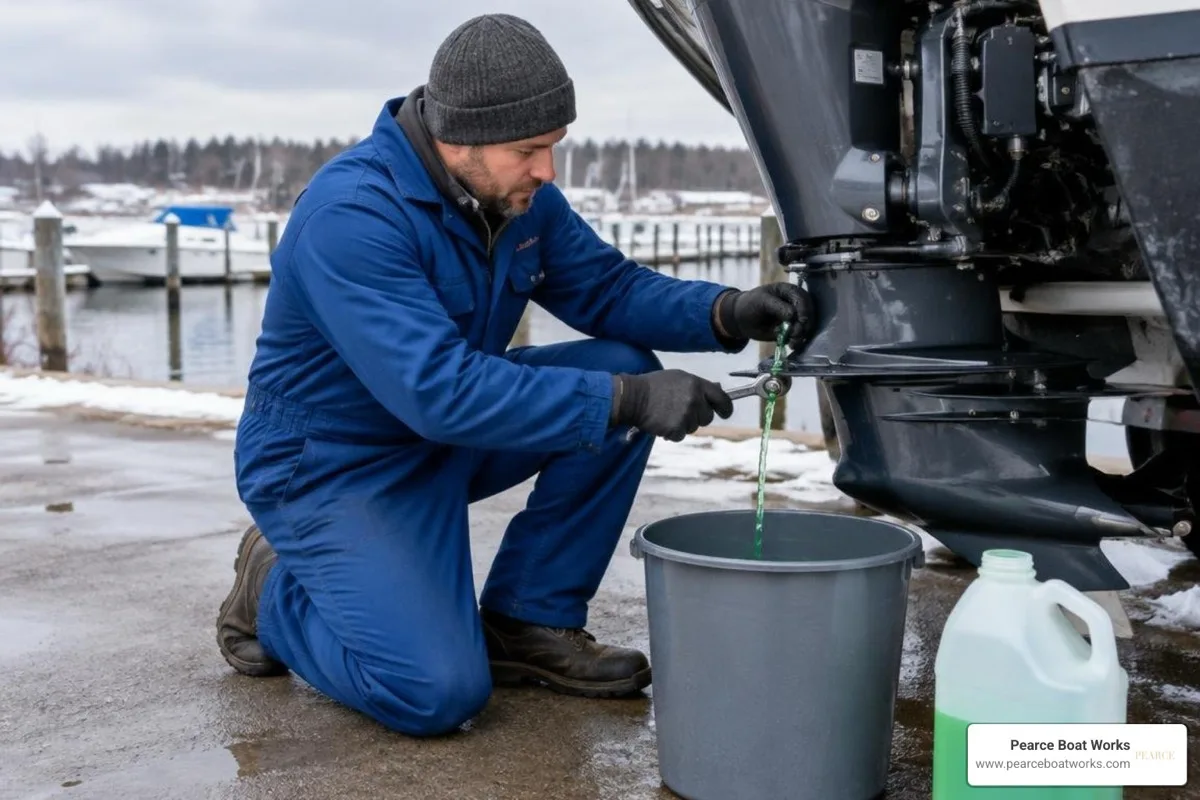
1. Engine Block & Cooling Systems: Flush raw-water cooling circuits with fresh water, drain engine blocks, manifolds, and heat exchangers, and run non-toxic, virgin propylene glycol marine antifreeze through the system until it flows steadily out the exhaust. Never use toxic automotive ethylene glycol. 2. Drive Systems & Lubrication: Drain and replace lower-unit gear lube on outboards and sterndrives, checking for milky discoloration that indicates failing shaft seals. Change engine oil and filters, lubricate external grease fittings, and fog the cylinders with marine fogging oil to prevent cylinder wall corrosion. 3. Fuel System Stabilization: Add marine fuel stabilizer to the tank and run the engine for 10–15 minutes to circulate treated fuel through injectors or carburetors. 4. Freshwater & Domestic Lines: Drain freshwater holding tanks, bypass your water heater, and pump non-toxic propylene glycol antifreeze through every faucet, showerhead, washdown, and marine head until colored fluid runs from all fixtures. 5. Battery Storage: Disconnect batteries, clean terminals, and keep them charged to prevent electrolyte freezing during deep temperature drops.
Interior Cleaning and Padding Sharp Protrusions
Before rolling out the plastic, deep clean the interior and remove cushions, life jackets, dock lines, and canvas biminis to store in a dry, climate-controlled space. Prop open the refrigerator and livewell doors so trapped air does not develop mildew. Place desiccant bags or moisture-absorbing buckets in the cabin, helm compartments, and bilge.
Finally, inspect the boat for sharp contact points that could puncture the film under tension:
* Wrap bow rails, anchor rollers, and cleats with foam pipe insulation or thick terry towels secured with shrink tape. * Protect windshield corners, fishing rod holders, outriggers, and low-profile antennas with cardboard or foam blocks. * Cover fuel tank external vents with marine tape to keep chemical fumes from collecting under the wrap while applying heat \\(remember to uncover them in spring\\).
Step-by-Step Process for Shrink Wrapping Your Vessel
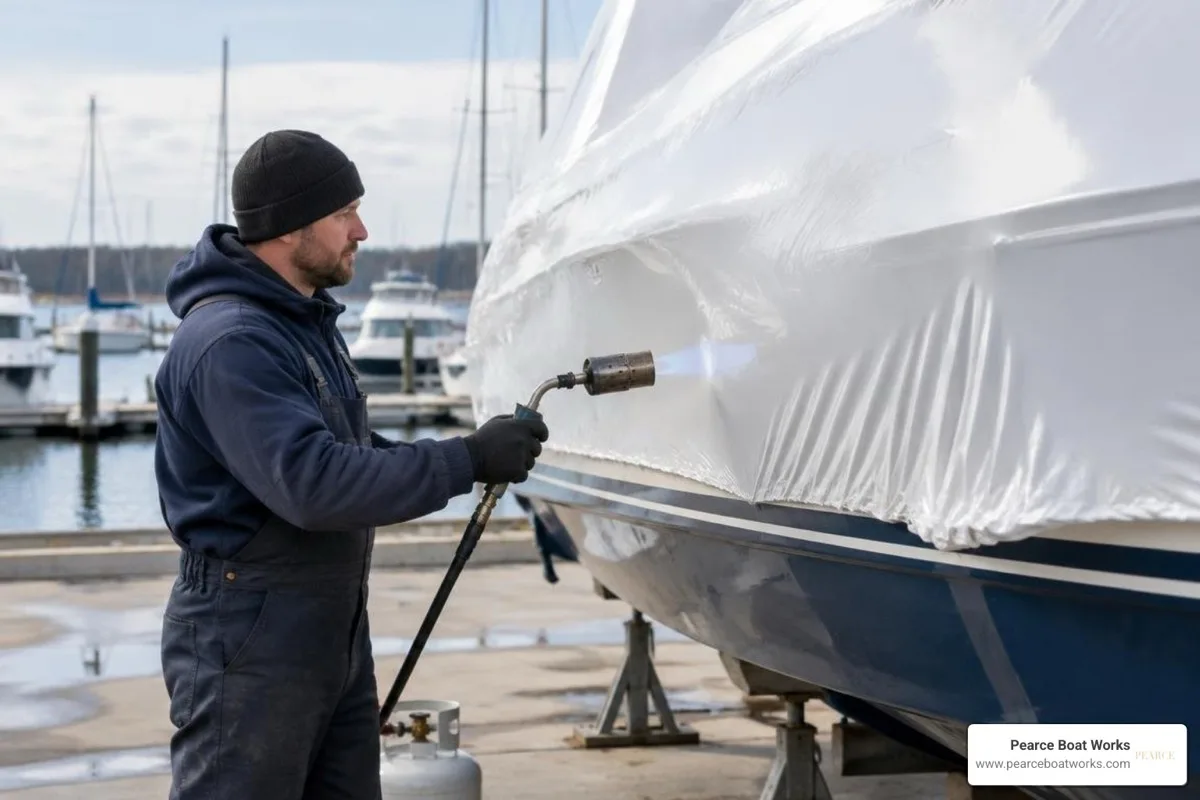
Proper installation requires careful framing, correct strap tension, and steady heat tool handling to create a durable, weather-resistant shell.
Tools and Equipment Required for Wrapping a Boat for Winter
Gather all materials before starting:
* Marine Shrink Film: Premium 7-mil to 8.5-mil UV-inhibited, virgin polyethylene wrap. * Woven Polyester Strapping: 3/4-inch woven cord strapping with a heavy-duty tensioning tool and steel wire buckles. * Support Poles & End Caps: Adjustable aluminum poles or 2x4 lumber with protective plastic top caps. * Propane Heat Tool: Marine-rated heat gun connected to a standard propane tank with a safety regulator and long hose. * Marine Heat-Shrink Tape: 2-inch or 4-inch specialized preservation tape for joining seams and taping pleats \\(never use duct tape\\). * Ventilation Caps: Weather-resistant louvers or self-adhesive moisture vents. * Safety Gear: Heat-resistant gloves, protective safety glasses, and a safety respirator or dust mask.
Building the Ridge Line Frame and Draping Film
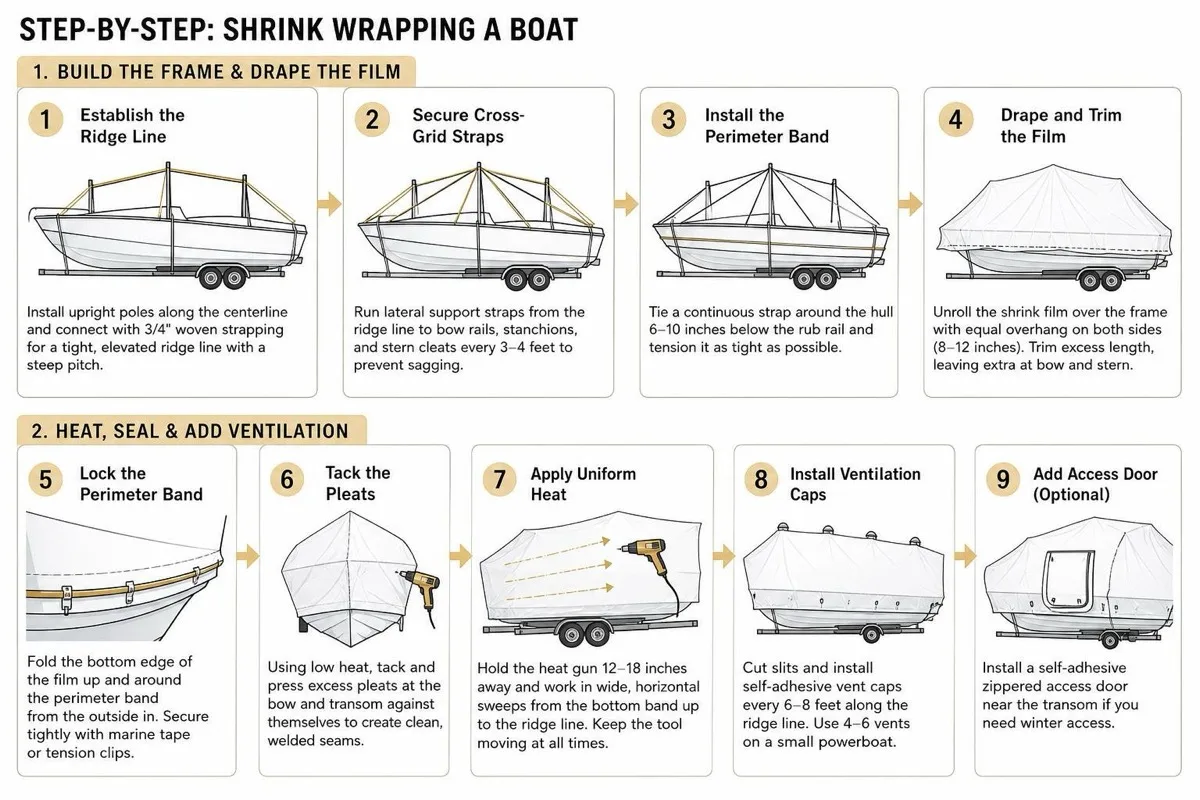
1. Establish the Ridge Line: Install upright support poles along the boat's centerline \\(one near the bow, one over the console/helm, and one near the stern\\). Connect them using 3/4-inch woven strapping to form a tight, elevated center ridge line. The pitch must be steep enough \\(minimum 45-degree angle recommended\\) to shed snow effectively. 2. Secure Cross-Grid Straps: Run lateral support straps from the central ridge line down to bow rails, stanchions, and stern cleats every 3 to 4 feet to create a web that prevents the plastic from sagging between spans. 3. Install the Perimeter Band: Tie a continuous loop of woven strapping around the boat's hull roughly 6 to 10 inches below the rub rail. Pull this perimeter band as tight as possible using your strap tensioning tool. 4. Drape and Trim the Film: Unroll the marine shrink wrap over the frame, ensuring equal overhang on both sides \\(leave 8 to 12 inches hanging past the perimeter band\\). Trim excess roll length, allowing extra material at bow and stern for folding.
Heating, Sealing, and Adding Proper Ventilation
1. Lock the Perimeter Band: Fold the bottom edge of the plastic wrap up and around the perimeter band from the outside in. Secure the folded plastic tightly using marine tape or tension clips. 2. Tack the Pleats: Walk around the vessel with the heat gun on low, lightly heating and pressing excess pleats at the bow and transom against themselves to create clean, welded seams. 3. Apply Uniform Heat: Light your propane heat tool. Hold the gun approximately 12 to 18 inches away from the film and work systematically in wide, horizontal sweeping passes from the bottom perimeter band up toward the center ridge line. Keep the heat tool moving steadily at all times to prevent burning holes through the sheet. 4. Install Ventilation Caps: Cut small slits and install self-adhesive, hooded vent caps every 6 to 8 feet along the upper ridge line. A small powerboat requires 4 to 6 vents to ensure adequate cross-flow ventilation. 5. Add an Access Door \\(Optional\\): If you plan to carry out winter repairs or access equipment, install a self-adhesive zippered access door near the transom before final inspection.
Key Mistakes to Avoid When Wrapping a Boat for Winter
* Scorching or Burning Holes: Lingering in one spot with the propane tool will instantly burn a hole through the plastic or scorch your boat's gelcoat. Maintain constant sweeping motions. * Skipping Proper Ventilation: Sealing a boat completely without vents traps condensation, creating an environment where black mold, mildew, and dry rot thrive. * Insufficient Frame Pitch: Creating a flat roof invites snow buildup and pooling water, which can collapse support poles and crack fiberglass decks. * Using Household Tapes: Standard duct tape or masking tape bakes onto gelcoat, degrades under winter UV light, leaves stubborn adhesive residue, and fails to bond with heated shrink film. * Neglecting to Pad Protrusions: Sharp antenna mounts, bow rollers, and windshield brackets will slice through the film as it tightens under heat.
Off-Season Maintenance and Inspecting Your Winter Wrap
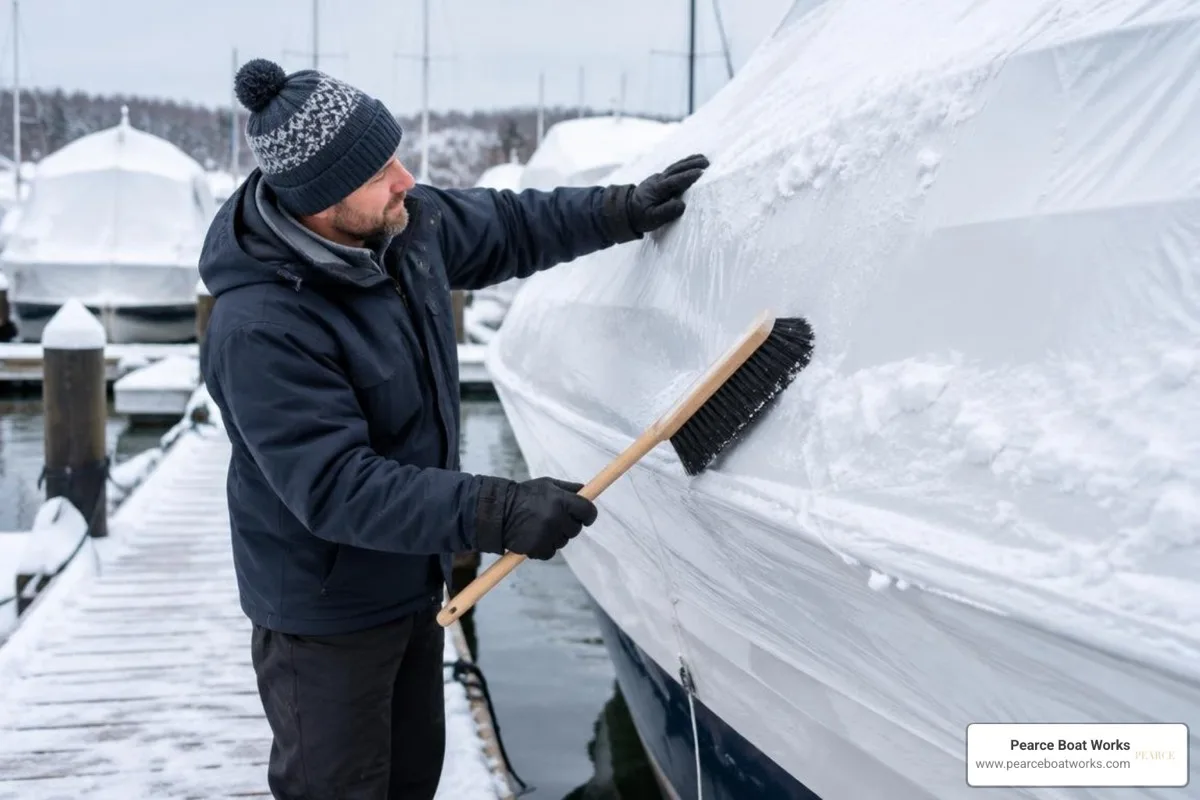
Shrink wrap is low-maintenance, but periodic monitoring keeps your vessel protected through deep freezes and blizzards:
* Monthly Walk-Arounds: Inspect your wrap after major wind events to ensure perimeter straps remain snug and no seams have lifted. * Snow Clearing: While a well-pitched frame sheds powdery snow naturally, clear heavy, wet accumulations or slush dams around the perimeter using a soft, long-handled broom \\(never use metal shovels or sharp scrapers\\). * Patch Minor Tears Immediately: Keep a roll of 4-inch marine heat-shrink tape handy. Clean and dry the damaged area, then apply a generous patch with rounded corners to stop wind from enlarging small punctures. * Clear Vent Louvers: Make sure ice, fallen leaves, and drifting snow do not block your ventilation caps.
Staying proactive through the winter ensures an effortless transition when you consult your spring commissioning checklist to prep your hull and engines for splash day.
Frequently Asked Questions About Winter Boat Protection
Can I wrap my boat myself or should I hire a professional?
DIY winterization and shrink wrapping can save money upfront. However, the process takes 2 to 4 hours for an amateur and involves open propane flames, high-tension strapping, and delicate structural framing. A professional marina team completes the installation in 1 to 2 hours using commercial-grade heat equipment, reducing fire hazards and eliminating the risk of accidental gelcoat burns.
What temperature is best for applying marine shrink wrap?
Aim for temperatures of 50°F \\(10°C\\) or higher on a calm, dry day. Cold polyethylene film is noticeably more brittle, resists clean folding around perimeter bands, and requires significantly more heat to shrink uniformly. Working in high winds can blow the hot flame back toward the operator or press loose plastic against hot nozzles.
How do I prevent mold and mildew under the wrap?
Ensure the boat’s interior is 100% dry before laying down plastic. Install hooded vent caps every 6 to 8 feet along the ridge to establish continuous cross-flow air circulation, and place moisture-absorbing desiccant buckets in open compartments to capture residual humidity.
Conclusion
Protecting your marine investment through freezing winter months requires combining thorough mechanical drainage, interior moisture control, and a drum-tight exterior wrap. Taking the time to winterize engines, flush plumbing lines, pad deck fittings, and install a peaked support frame shields your boat from freeze damage, mold growth, and structural stress.
If you prefer to leave the open flames, strapping tensioners, and engine winterization to certified technicians, our team at Pearce Boat Works is ready to help. Our master mechanics and yard crew provide transparent, high-quality craftsmanship, from complete powertrain winterization to custom marine shrink wrapping. You can easily reserve winter storage with us to keep your vessel protected, dry, and ready for next season's launch.